Home composting: tips, tricks and how-to guides
On this page you will find everything you need to know about home composting. This information includes various troubleshooting items, and how to make compost and build your own compost bay.
By composting at home, you will:
- reduce your need to buy chemical fertilisers
- save valuable space in your garbage bin
- improve your garden
- help Council keep waste management costs down by reducing the amount of rubbish collected and buried at the waste facilities.
What is compost
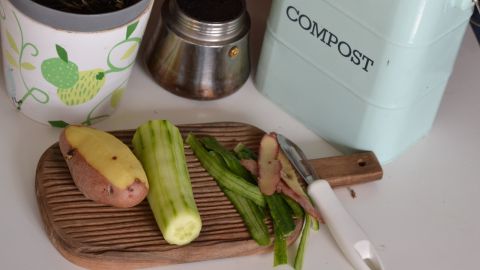
You can recycle almost 40% of your household waste, and most of your garden refuse, into garden fertiliser called compost.
Compost is partially decomposed organic matter. Good compost provides plants with food and conditions the soil by adding humus.
Composting creates the ideal conditions for bacteria, fungi and other micro-organisms to break down organic matter. This means adequate moisture (but not too wet), good aeration and a pH close to neutral.
What we can compost
We can compost almost any plant material, including:
- grass clippings
- leaves, flowers, non-woody prunings
- kitchen scraps, tea leaves, eggshells
- manure
- chipped and shredded prunings.
Fibrous or woody materials do not make good compost. You should not compost:
- diseased plants
- weed bulbs (oxalis and onion weed)
- toilet waste
- animal matter
- treated timber products
- inorganic matter
- the runners of plants like couch, wandering jew and vinica.
Although compost generates considerable heat, disease organisms and weed seeds can still survive.
Bins: Whether to buy or build
You can buy a compost bin (two bins are better - one for curing while the other fills), or you can build a simple heap out of scrap material. The secret is to make sure you have provided food for the bacteria (manure or blood and bone), and the bacteria has enough air (by turning the heap).
Building a bin
As a minimum you will need two bays - one to collect fresh material, the other for the decomposing pile. An inexpensive way is to get a few sheets of iron and some strong stakes ie, star pickets or reinforcing bars.
Put the bin on the soil to allow the worms and soil microbes to get in and for excess water to drain.
If Kikuyu Grass is a problem, it may be easier to put a barrier on the soil (large old car bonnets have proved effective) and introduce the worms yourself.
Cover the compost with a hessian sack or piece of carpet.
How to make compost
Step one: Chop large pieces
The smaller the material you add, the quicker the decomposition. You can chop large pieces with a spade or if you can afford it, buy a mulcher.
Step two: Put materials in layers
Mix your materials: alternate layers of leafy green material or lawn clippings with dry leaves or twiggy matter. The layers should only be about 10cm to 15cm thick.
Place a spade or two of soil between the layers (to add bacteria), and a few handfuls of blood and bone or some manure every couple of layers (to feed the bacteria).
Step three: Turn the heap
As the heap decomposes it settles and this forces the air out. You must now turn the heap.
If you have a plastic bin lift it off, put it next to the exposed heap and turn it back in. Add food for the busy bacteria approximately every 15cm, a few handfuls of blood and bone or more manure.
If you have a bin with bays turn from one bay into the next, again adding more food.
If you have a two-bay bin you can heap the decomposed compost against the second bay.
Step four: Watch the garden grow
The compost can be ready in about eight weeks in summer, however it can take longer in winter.
Put the finished product back onto your garden and watch the plants smile.
Waste is a resource
Attitudes to waste are changing as people realise it can be a resource, rather than a problem. Composting is an obvious example.
Another example is worm farming where you can use your kitchen scraps as worm food to yield valuable worm castings.
- Choose the right spot - in semi sun/shade.
- You will need: compost bin, spade, watering can/hose, greens and browns.
- Place ‘browns’ in crates near the bin for easy access: paper, hay/straw, cardboard, ash, twigs/leaves/branches.
Step one
- Slice grass off top with a spade to allow worms easy access.
Step two
- Assemble compost bin and place on the bare ground (leave lid off).
Step three
Add the following layers:
- Layer one: sticks to promote air circulation from the bottom.
- Layer two: earth (add what you sliced away plus enough to cover sticks with a layer around one inch [2.5cm] thick). This adds microbes and bacteria that are so important to the composting process.
- Layer three: one inch (2.5cm) of poo (any herbivore) as it is a great natural fertiliser to boost the cooking process. No dog or cat poo because of the potential bacteria and worms.
- Layer four: one watering can of water. Moisture is essential to keep it hot. The oven is now set to start cooking.
- Layer five: organics (food scraps, coffee grounds, fresh grass clippings, pasta, rice, eggshells, human hair, seaweed).
- Layer six: always cover organics with a layer of browns. Remember 3:1 ratio: either paper, hay/straw, dry leaves, cardboard, sawdust or mix.
- Layer seven: repeat layers five and six until the compost bin is nearly full but manageable for you to continue to turn the contents. Add water when necessary to keep moist but not soggy.
Step four
- Click lid into place.
- Happy composting!
There are various items around the home that you can compost:
Kitchen
- coffee grounds and filters
- tea bags and tea leaves
- the crumbs you sweep off the counters and floors
- cooked pasta (containing no meat, fish or chicken)
- cooked rice (containing no meat, fish or chicken)
- stale bread
- stale crackers and biscuits
- old herbs and spices
- pizza crusts
- stale beer and wine
- old jelly, jam, or preserves
- nut shells (not walnut shells - can be toxic to plants)
- stale cereal and boxes (tear into smaller pieces first)
- used paper plates (not ones with waxy coating)
- wine corks
- paper egg cartons
- pizza boxes - torn into smaller pieces
- paper bags - either torn or rolled into balls
- used paper napkins
- toothpicks
- bamboo skewers
- paper cupcake or muffin cups
- paper towel rolls
Bathroom
- used tissues
- hair from your hairbrush
- toilet paper rolls and paper wrapping
- old loofahs (from natural materials)
- nail clippings
- 100% cotton balls
- 100% cotton buds - cardboard (not plastic) sticks
Laundry
- dryer lint (from natural fibre clothing)
- old/stained cotton clothing (tear into smaller pieces)
- old wool clothing (tear into smaller pieces)
Office
- bills and other shredded documents
- envelopes (minus the plastic window)
- pencil shavings
- sticky notes
- business cards (not glossy)
- receipts
Around the home
- dust (from floors or natural fibre carpet)
- newspapers (torn into smaller pieces)
- subscription cards from magazines
- leaves trimmed from house plants
- dead house plants and their soil
- flowers from floral arrangements
- used matches
- ashes from the fireplace or barbecue grill (cooled)
Party and holiday supplies
- wrapping paper rolls
- paper tablecloths
- crepe paper streamers
- natural holiday wreaths
- ‘live’ Christmas tree (chop into small pieces first)
Pet related
- fur from the dog or cat brush
- feathers
- fish food
Flies in your compost heap
People often complain about tiny flies in and around their compost heap. The first thing to remember is that this is nature at work. These tiny flies, along with other microbes, ants, worms and bacteria in the bin, help to decompose the organics.
You won’t attract ordinary household flies if you don’t put any meat or bones into your compost. The tiny flies are most likely to be Vinegar Flies (Drosophila melanogaster). These flies like the fermenting or rotting fruit and are common in compost.
The Vinegar Fly is not a fruit fly as it does not feed on fruit - only the yeast associated with rotting fruit.
Troubleshooting tips
- Always keep your lid on tight: this keeps the rain out (so your compost doesn’t get too wet) and hinders the flies.
- Always put a thin layer of fine mulch over every layer of ‘wet’ waste you place in the bin: this makes it difficult for the flies to get to the vegetable waste. Another great cover is vacuum cleaner dust.
- Plant some dense shrubs near your compost bin: this will attract birds who love to spend the afternoon eating Vinegar Flies.
Debunking some myths
There are often questions about whether some vegetable items can go into the compost. You will soon discover what does and doesn’t work for you, however you should see good results with these items. A good tip is to cut them into small pieces to help speed up the decomposition process.
Citrus peels may take several years to decompose in a compost pile due to the high concentration of citrus oils. The smaller the pieces, the faster the decomposition.
You can add crushed egg shells to a compost pile, if washed - shells are a high source of calcium and beneficial to the soil.
Ensure you cut up onions before you add them to the compost, as they may want to sprout before they break down.
Getting the most out of your coffee grounds
Coffee drinkers can help their gardens by recycling coffee grounds. Coffee grounds from plungers, percolators, drip filters and coffee making machines are great for the garden.
Coffee grounds are organic matter and even though they are brown, they fall into the ‘greens’ composting category. This means they are rich in nitrogen. They also contain magnesium, calcium, potassium and other trace minerals.
You can use your coffee grounds around your yard in different ways:
- Add them to your compost bin: they are a valuable source of nitrogen. You can put the grounds and the paper coffee filter into the compost bin as it will all break down.
- Add grounds to the soil in your garden: you can scratch it into the top couple of centimetres of the soil, or sprinkle the grounds on top and leave them alone.
- Create a slug and snail barrier: coffee grounds are abrasive and acidic, so a barrier of grounds placed near slug-prone plants may save them from these garden pests.
- Make coffee ground ‘tea’: add one cup of used coffee grounds to a standard 9.6 litre bucket of water. Let it sit for a few hours or overnight, then use it as a liquid fertiliser for your garden and pot plants.
- If you have a worm farm, add about a cup of coffee grounds every week or so – worms love it!
If you are having odour issues with your bin, here are three easy steps to solve the problem:
Step 1: Get the right ratio
This is always one of the first things that you should check in the compost bin. You may have too much green debris that is overpowering the other waste.
Fill your bin with about three to four parts ‘brown’ material to one part ‘green’ material.
A high proportion of greens (kitchen waste/grass clippings) can be the cause of a strong smell in the bin. Add more browns (wood prunings, paper or cardboard) to fix the problem.
Step 2: Let air in
The absence of air will cause the composting micro-organisms to stop working. However, a different type of micro-organism that does not need air will replace them. The by-product of this activity is a smell similar to rotten egg.
Make sure your compost bin has holes in it so that air can get in and break down the materials. If there aren't holes, take the lid off. It’s important to let air get to your compost pile.
You can turn some compost bins so you combine the material with every turn, however if your bin doesn't have this function, make sure you stir it. This also helps to reintroduce air to the compost.
Step 3: Don't add meats, oils, fats or carnivore droppings
Do not add meats, oils, fats, or any droppings from carnivores. You can add droppings from vegetarian animals like horses, cows and goats.
Meat and oils contain fats that don't break down as quickly and attract unwanted pests and insects to the compost pile.
Getting the ‘greens’ and ‘browns’ ratio right
Generally, a ratio of three to four parts browns to one part greens is the best way to keep your compost cooking nicely. Decomposition happens – it’s a natural process, but the right ratio can reduce odours from your compost bin.
Browns are carbon or carbohydrate-rich materials - they are a food source for the soil-dwelling organisms that work with microbes to break down the contents of your compost pile. They include:
- dried leaves
- pine needles
- twigs, chipped tree branches/bark
- straw or hay
- sawdust
- corn stalks
- paper (newspaper, writing/printing paper, paper plates and napkins, coffee filters)
- dryer lint
- cotton fabric (cut up)
- corrugated cardboard (without any waxy/slick paper coatings).
Greens are materials that are rich in nitrogen or protein. They are also the items that tend to heat up a compost pile because they help the micro-organisms in the pile to grow and multiply quickly. They include:
- grass clippings
- coffee grounds/tea bags
- vegetable and fruit scraps
- plain pasta and rice
- plant and tree trimmings
- weeds that haven't set seed
- human hair
- eggshells
- animal manure (cow, horse, sheep, chicken, rabbit, etc. No dog or cat manure)
- seaweed.
Contact us
If you need more information about home composting, contact waste services on:
- T: 4474 1024
- E: Council's waste services